Wednesday, May 4, 2016
Variations of Painting
For this project, we got to learn about painting with different objects besides a paintbrush. Each student got the chance to practice stamping and smearing with a carrot, a piece of celery, an apple, and a spoon. After practicing, each student got a fish template, and could use the four objects to stamp and smear on their fish. We then glued a googly eye so the fish had a face. On the bottom of the piece of construction paper, we had to write down the four items we used to paint, and four other items that we could've used instead of the carrot, celery, apple, and spoon.
An extension activity for painting could be to use their hands and fingers to paint animals. Students could use their whole hand to create a small bird, and use a paintbrush to add details, such as a tree branch to sit on and a face and wings, or students could also use their finger tips to create different colored and shaped flowers.
Examples at:
http://dalimoustache.blogspot.com/2012/04/hyacinths.html
http://www.artsonia.com/museum/art.asp?id=40015797&artist=1060709&gallery=y
Here is the bulletin board we created to display the students' artwork:
Monday, May 2, 2016
Stamping
In this lesson, we got to create stamps out of a Styrofoam rectangle. We learned about pattern, and created patterns using lines and shapes. To create the patterns on the Styrofoam, we just drew it on the rectangle using a pencil. After that, we used a paint roller and rolled paint onto the Styrofoam. Then, we pressed the rectangle, paint side down, onto our construction paper. For the bottom stamp, we got to create a different one, with symbols that are important to us. I created an airplane, to represent my love of travelling, a volleyball, to represent that I play volleyball at NSU, and a stick-person family and dog, to represent my family and dog!
A few extension activities for stamping could be to use different objects to stamp with. Students could use an empty toilet paper roll, and make slits on one end to create fireworks. Also, students can use a marshmallow to stamp a shamrock to represent St. Patrick's Day. One last one could be to use a balloon with blue and green paint to create mini Earth's while talking and learning about Earth Day.
Dr. Seuss 3-D Mini Creatures
For this project we listened to the book Oh, The Places You'll Go! by Dr. Seuss, and we viewed different imaginary creatures that Seuss created in many of his books. Then, we got to create our own imaginary creature, and first drew it out on paper. We learned about foreground, middleground, and background, and we created a scene by adding or drawing items in each of the distances. Lastly, we got to create our drawn creature out of Play-Doh, and added them to the scene.
An example of an extension activity could be to have the students choose a type of landscape, such as desert or tundra, and create a landscape using different colored construction paper. They would focus on foreground, middleground, and background, and have different aspects and characteristics of that landscape in each distance. This is great for teaching students what different landscapes look like and their main characteristics.
1st Grade, 1st Grade What Do You See?
For this project we focused on the book Brown Bear, Brown Bear, What Do You See? by Billy Martin Jr. We each got an animal template and we used different colored and patterned paper to cover the template with. We then cut it out and glued the animal to a piece of colored construction paper. At the bottom, we wrote about what animal we saw and a few characteristics of that animal.
Another project we could do relating to this book could be to create animal masks from paper plates. The students can color their paper plates, and add different colored and patterned paper to create the mouth and nose, and finally cut holes for the eyes. They would then punch two holes, one on each side of the paper plate, and tie a string through the holes. The students could then wear the mask and act out a few characteristics of the animal they created.
Wassily Kandinsky
For this project we learned and focused on the painting styles of Wassily Kandinsky. We dipped a sponge into different colors of paint and created a rainbow. We then cut the rainbow out and waited for it to dry, and in the meantime we painted, using either a sponge or paintbrush, a background for the rainbow. After everything was dry we glued the rainbow to the background.
An extension project could be to focus on the style of Kandinsky's painting Yellow-Red-Blue (pictured below). Students can draw bold lines across their paper, and work on painting each small space or geometric shape created by the lines a different color.
Kandinsky's Yellow-Red-Blue:
Wednesday, April 27, 2016
Animal Pinch Pot
For this lesson, we learned how to create pinch pots out of clay. We had to get rid of all the air bubbles in the clay and then shape the clay in a sphere. Then we pressed our thumb into the middle of the ball of clay and pull out while we shape the outside of the clay with our fingers. We learned about additive and subtractive, which are adding pieces of clay and/or carving out of the clay, and we had to use one of each techniques while creating an animal from our pinch pots.
An extension activity could be to create piggy banks out of clay. The students would also have to create a type of pinch pot by opening creating an opening in the center of the clay, but then they would have to close off the top by adding a slab of clay and creating a slit at the top to put in change. They can do the same concept as we did in this project by turning their piece of clay into an animal, so the students still learn about additive and subtractive techniques.
Example:
Thursday, April 7, 2016
Crayon Resist with Monet
In this project we recreated Claude Monet's Bridge over a Pond of Water Lilies. We started by drawing the bridge, clouds, water lilies and flowers with crayon, and after that we used watercolor paint to paint in the background. We used mainly warm colors to draw with crayons and we painted with cool colors. We had to use a lot of water to the paint in order to get a gradient and faded effect.
Monet created a lot of paintings of water, with flowers and trees and buildings or rocks reflecting in the water. To get students to practice reflection, students could create a body of water and choose to draw something that is reflecting in the water.
Monet created a lot of paintings of water, with flowers and trees and buildings or rocks reflecting in the water. To get students to practice reflection, students could create a body of water and choose to draw something that is reflecting in the water.
Van Gogh Sunflower
For this project we focused on drawing. We had to draw our own shaped vase, the flower petals, and the flower stems and leaves. We used crayons to color everything and then used bright yellow paint to paint the flower petals. For an added effect, we glued sunflower seeds around the center of each flower. This work of art was inspired by Van Gogh's paintings of flowers.
An extension activity you could do for drawing could be to take a close up picture of students' faces, print them out, and then cut them in half vertically. The students would then get to draw the missing half of their face. This would be a great activity to get students drawing and interpreting how they perceive their own facial features.
An extension activity you could do for drawing could be to take a close up picture of students' faces, print them out, and then cut them in half vertically. The students would then get to draw the missing half of their face. This would be a great activity to get students drawing and interpreting how they perceive their own facial features.
Thursday, March 3, 2016
Van Gogh Inspired Collage
One extension activity you could do with this project would be to create a painting project, but using short and small brush strokes like Van Gogh a lot of times used in his own work. You could give the students a general landscape to paint, such as the sky or a body of water, and they would have to use short brush strokes to paint majority of the picture.
Example of Van Gogh's work to inspire students for this extension project:
Tuesday, March 1, 2016
Hidden Safari
This project we focused on warm and cool colors. To start, we created a contour drawing of an animal by drawing it upside down. We picked an animal that you'd typically see in a safari; I chose a zebra. We drew our safari animal in a light blue color, and then over the top of the animal we drew lines and shapes in bright warm colors. We created Ruby Red Glasses using red construction paper and a red film. When you look through the red glasses it filters out the warm colors, so all you're left with is the cool light blue color, therefore showing your hidden animal.
An extension activity that can be done to teach students about warm and cool colors is to have the students start by tracing their hand on a piece of white paper. Then, the students can draw straight, curvy or loopy lines all throughout the paper. The students then can pick certain colors to use and color in the shapes, using a lot of different colors to fill the page. The students should use cool colors on the outside of their hand, or in the background, and on the inside of their hand they should use warm colors. This activity will help students differentiate between warm and cool colors, and help them remember if a color is warm or cool.
Example:
Thursday, February 4, 2016
Elements & Principles of Art Scavenger Hunt
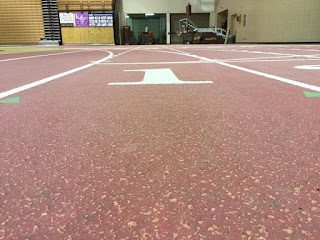
Texture
Track inside the Barnett Center
Pattern
Brick flooring by Kramer Hall
Color
Sunset taken on Fairground Road in Aberdeen
Contrast
Box of athletic tape in the Training Room
Balance
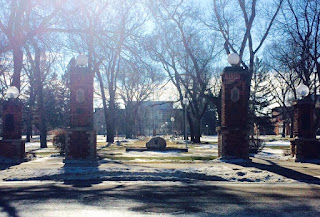
Northern State University's campus
Thursday, January 28, 2016
Footprint Introduction
The first project we completed was a footprint introduction of ourselves. This project is a great way for teachers and students to get to know one another with an interactive project. We started out by tracing our foot and cutting it out to use as the base for the project. Next, we put our name big and legible in the center so it was easy and clear to read from a good distance. We then had to use different mediums, such as construction paper, crayons, newspaper, found objects, etc., to describe ourselves. Completing this project was very fun because you got to search your house for different objects and ideas that are important to you and represent you in some way. Once we found different objects and mediums for our foot, we then drew a layout of those objects, making sure everything fit and was balanced and somewhat overlapping. The last step was to glue everything on the foot following the layout we just made.
On my foot, pictured above, I have different objects that represent my interests and family. On the toes of my foot, I drew stick people for myself, my four other siblings, and my dog. Going along with the family trend, I added a mini Polaroid picture of my family dressed up in Star Wars pajamas on Christmas. In between those objects I added a volleyball to represent playing volleyball here at Northern State. Towards the top of the foot I have a minion clothespin to represent my love of minions. Next to that I placed music notes and the word "Dance" to symbolize being in band for six years and dance for fifteen. Next to that, I added an apple to show my passion and dream of becoming an elementary teacher. Last, but not least, I have a sticker of a plane to represent my love of traveling, along with Mickey Mouse ears to show my favorite place to travel; Disney World.
An extensive activity that can be used for this could be used in math. The teacher would have the students measure their foot length, and the students would have to put their feet in sequential order according to the size from least to greatest. This activity would work better with younger students that are learning how to put numbers in a sequential order.
Subscribe to:
Posts (Atom)


